The Clever Coffee Dripper is an excellent coffee making device for beginners. It uses a ‘Pour Over’ body design combined with an immersion brew which is incredibly easy to learn and to master, which combined with its modest price point is why it’s become so popular over the last few years. It gets a big thumbs up from me!
If you’re looking for a cheap way of making high-quality coffee then this will do the trick. You can check it out on Amazon here or alternatively, read on for a pretty in-depth analysis of this humble little coffee maker!
Clever Coffee Dripper Review
When the iPhone was first released eleven years ago, its tagline could’ve been “simple, but effective”. Its elegant design took all the plaudits but underneath the surface was a revolutionary technology that basically transformed the world.
If you don’t believe me, get the smartphone that you definitely have and look at its touchscreen, color display, high speed internet etc.
Anyway, I like things that are simple but effective, and today I’m going to be giving the full rundown of the Clever Coffee Dripper which could use that phrase in advertisements.
This thing is great for newbies. You can learn how to make a great brew with it inside a day, unlike certain other coffee making methods… *cough* *cough* And don’t let that confuse you for this being a ‘beginner’ coffee method – it is capable of making brewed coffee that can compete with the best.
It produces the lovely clean and bright taste of a Pour Over without having to stand over and pulse pour every 30 seconds, and it gives you full control over brew time like a French Press without the sediment collecting at the bottom of your cup.
There’s a whole bunch of reasons to get one including one lovely little quirk that makes it a regular fixture in my coffee making. And to whet your appetite, here’s a few photos taken with one of those iPhone things…
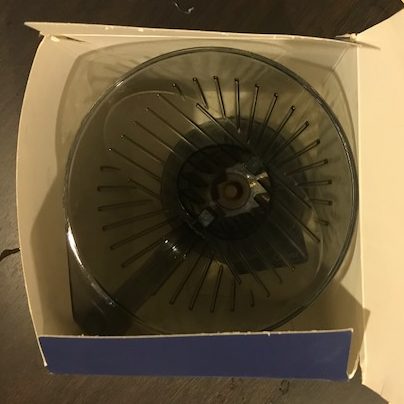
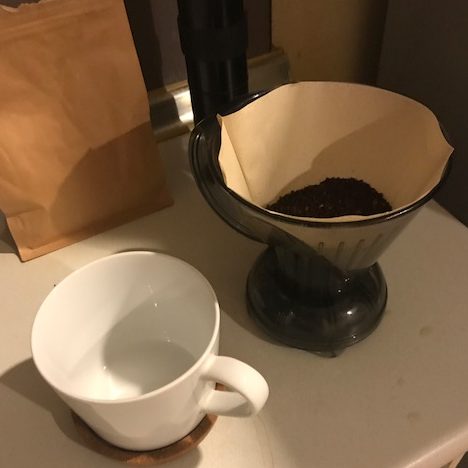
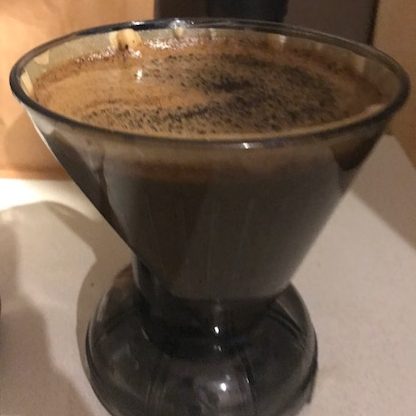
Initial Impressions Of The Clever Coffee Dripper
The company that sells the Clever Coffee Dripper is called Abid. They do license out this particular design to other companies who stick their name on it and sell it. May as well get the original, right?
The Clever is built around a valve at the bottom of the device which is only activated when you put it onto a cup or carafe. This means that the coffee stays brewing for as long as you want, then you put it on a cup and it all rushes down through the filter.
It’s quite unique in that it’s built like a Pour Over, using a paper filter, but brews the coffee by immersion like a French Press. This makes it super easy for the beginner while also giving control over brew time that would appeal to the more advanced coffee drinker.
You can even leave the valve open the entire time which turns it into a regular Pour Over.
The Clever feels sturdy if a little lightweight. It comes with a lid for keeping heat in and a coaster to prevent spillage. My lid and coaster have been lost to the sands of time but I wish I still had them, well, the coaster at least…
I once sat my Clever down on the kitchen counter and came back to a puddle of brown coffee dripping onto the floor. It turned out I had placed it on a store receipt which somehow was strong enough to activate the opening valve!
The Clever uses a #4 filter that you can buy from any half-decent grocery store. And as a bonus, the Abid that I’ve linked to in this article comes with 100 filters so you’re sorted for your first 100 brews!
Bleached or unbleached? That is to say, the white ones (bleached) or the brown paper looking ones (unbleached)? Some people swear by one or the other.
A common school of thought is that the brown, unbleached filters taste a bit papery but I’ve never noticed a difference in taste. And you can always prewet the filter (run some hot water through first) as many people do. Anyway, I’ll leave this decision up to you.
The device will fit cups (or carafes) that measure between 1.5” and 3.75” in diameter. I.e. pretty much all of them. You may want to check, though.
Lastly, all parts are “Fashioned with BPA-free Eastman tritan plastic,” I don’t know what all of that means, but it sounds good though…
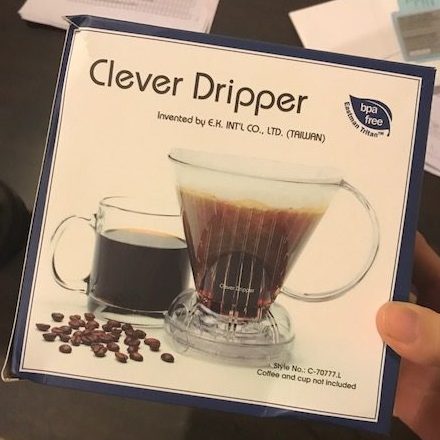
Setup
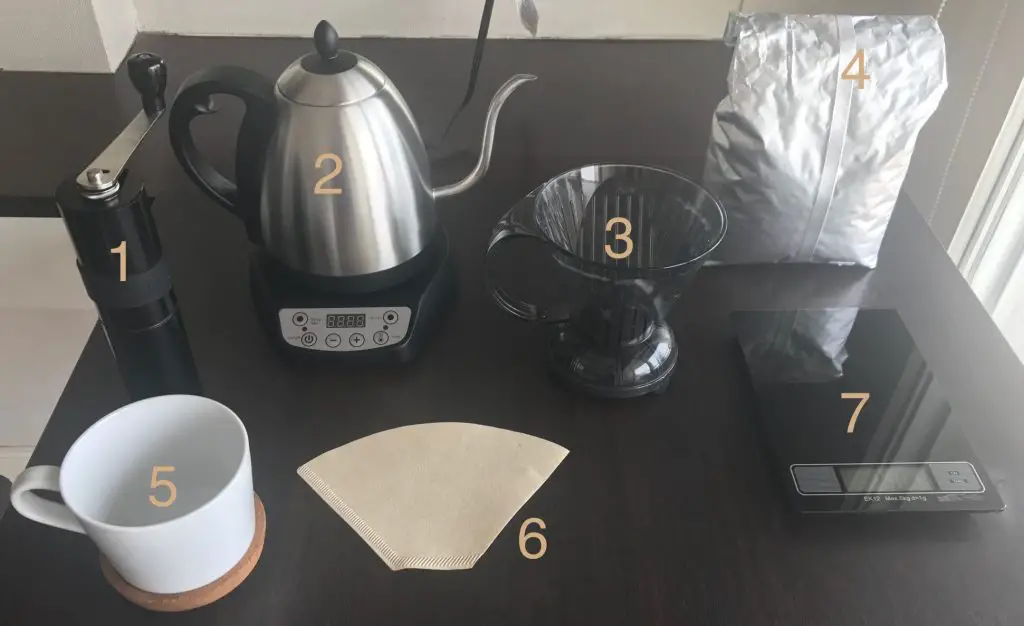
1. Feldgrind coffee grinder – This is a relatively expensive coffee grinder that knocks out a fantastic fine grind. You can check out a few of my recommended hand or automatic grinders here but fair warning, if you’re not willing to shell out $100+ then stick with preground for now.
2. Bonavita gooseneck kettle – For this method, any way of getting boiled water is fine.
3. Clever Coffee Dripper – I hope you know what this thing is by now.
4. Coffee beans – In a 1kg (2.2lbs) industrial sized Pat quantity.
5. Cup
6. Filter – Unbleached #4.
7. Kitchen scale – I use this one because I’ve owned it so long. It’s actually not ideal as it only measures to 1g whereas really you want 0.1g.
How Do You Make Coffee With The Clever Dripper?
Step 1 – Boil your water
I’m using a temperature kettle here but you don’t need to. A good measure is 20 seconds off the boil. More or less is fine but try to be consistent, the temperature does affect the brew so the important thing is that you’re using roughly the same temperature each time. Of course, a temperature kettle is ideal…
Step 2 – Grind your coffee
A coarse grind is recommended for most immersion brews to match the longer brew time. Remember a good grind consistency is one of the keys to top tier coffee making. If you go preground, ask for French Press. The grind size is one of the key variables to play around with. In the gif on the right, I’m actually using quite a fine grind (1+6 on my Feldgrind) because I think my coffee grinder does a much better fine than coarse.
Step 3 – Prewet the filter
Use hot water to rinse the filter – this reduces the chance of you getting a noticeable papery taste in your coffee among other advantages. You can throw away the water when you’re done. You’ll notice I use an unbleached brown paper filter, if you’re prewetting then it doesn’t matter too much. You might also notice I messed up the filter a bit at the end of this gif!
Step 4 – Add coffee
Chuck that brown gold straight into the filter.
Step 5 – Add water
Pour the water in, no need to bloom for an immersion method although you can see the little bubbles of CO2 popping out. Start your timer as soon as you pour.
Step 6 – Let it brew
A quick stir is useful but you don’t need to go overboard. Aim for 3-4 minute brew time for a coarse grind. The brew time is the other important variable (as well as grind size) that you should measure and adjust.
Step 7 – Put your clever on your cup
The drain should take between 30 seconds to a minute depending on your grind size, the water will take longer to find its way through a finer grind. If it’s not all drained after a minute I recommend you remove it anyway to remove the chance of overextraction.
Step 8 – Take Clever off
You now have a cup of coffee!
My current standard recipe then is:
![]()
I use quite a fine grind and short brew time, this is because the Feldgrind grinder I am using does an excellent fine grind and a less excellent coarser grind.
As always, experimentation is the name of the day. It usually takes me 5-10 brews with a new method to get it from 7/10 coffee to 9/10 or 10/10 coffee. This processing of measuring and adjusting is called ‘dialing it in’ and is vital if you want to make top tier coffee.
The Good Stuff About The Clever
| Overview | |
|---|---|
| Price | $30 |
| Brewing Time | 30 seconds |
| Tasting Profile | Bright, Light, Smooth |
| Size | 5″ x 5″ x 11″ |
| Filter | #4 |
| Amount of Coffee Produced | 16oz~ (473ml~) |
| Ease of Use | |
| Build | |
| Body | |
| Flavor Clarity | |
Little hassle. Alright, here’s what I love about the Clever and the reason why it’s a regular in my rotation: it’s just the most convenient thing ever. You wake up, get the kettle and the grind going and pour your stuff in the Clever. I set a timer and leave to go and brush my teeth/make a drink/check sports news…
A couple minutes later? My coffee’s done. Takes about 5 minutes with about 15 seconds of actually doing something. If you’re looking for something easy that can still make fantastic coffee, this is it. And that’s not even getting started on…
Super easy to clean. Pour Overs are know to be easy to clean. Throw the filter in the bin, rinse and you’re done in 10 seconds flat. This is the same. I’d wager that the incredible convenience of the Clever, combined with its ability to make great coffee, are one of the reasons why it’s caught on like wildfire.
Not everyone’s got an hour in the morning to sort out a siphon brew!
Can control brew time. To get a little technical for a second, making great coffee has three major variables: grind size, water temperature and brew time. By adjusting these slightly I have turned what I thought to be average, bitter coffee beans into smooth, balanced gorgeous cups.
Most Pour Overs don’t give you the option of changing brew time, you just pour that water down. The Clever gives you full control, allowing even a beginner to start sciencing their way to a cup of fantastic coffee.
Great if you like a big cup. The large size produces about 16oz of brewed coffee, pretty much the goto size for a substantial cup. No deciding whether you want to make yourself a small brew with your 3-cup French Press or get something big and caffeinated at Starbuck’s, with the Clever you get the best of both worlds.
Great for beginners. This method and the French Press are the two easiest ways to make coffee. Both can be learnt in minutes, they are quite similar to be fair.
The Clever has the advantage of making a sediment free (bold) cup which I’ve found to be a turn off to those who are just getting into making their own (good) coffee.
No extra equipment. Your average Pour Over device requires a finicky amount of dexterity and effort and really you need a gooseneck kettle to get the best extraction.
Not so with the Clever, throw all your water in at the same time and let it brew. Save that extra money for beer/food/saving for an implausibly expensive coffee grinder!
Potential Issues
Not forgiving of grind size. Like anything that requires a coarser grind, it’s not too forgiving of grind size. If you have a cheaper burr or blade grinder that will produce an inconsistent grind, you will be left with lots of tiny particles of coffee (called fines) that will heavily overextract and add a bitter taste to your brew.
This method needs a decent grinder. Preground can be made to work under certain circumstances, too.
It’s not technically Pour Over. The hallmarks of Pour Over coffee are an emphasis on lighter and acidic flavors, good technique and percolation style brewing. While the Clever is a great choice and is still closer to Pour Over than any other method, it isn’t Pour Over.
There are a bunch of other great devices which I suggest you check out if you’re totally taken by the idea of having the real thing.
What Does The Coffee Taste Like?
The Clever’s unique method of immersion followed by a Pour-Over-like draining through a paper filter produces a quite unique set of taste characterstics.
Pour Over coffee is known for producing a bright coffee that highlights the lighter and mroe acidic notes, the French Press is known for a thicker and more full-bodied cup. The Clever gives a taste somewhere in between, probably closer to the Pour Over, in my experience anyway.
PAIR WITH: This is a versatile method. A few recommendations might be some darker Asian coffees that can add little touches of cocoa or hazelnut to the palate.
My Opinion On The Clever Dripper
As I mentioned earlier, this is my ultimate convenience method. If I’m short on time then I’ll pop the clever on with a coarse grind with a 3 min brew time then a 1 min drain time.
I come back to the sound of my timer and pour myself a great brew. It’s telling that given the stupid amount of time I’ve spent making and learning about coffee over the years, this one is still in my rotation. (i.e. I’m lazy)
I’d also say that, amongst beginner/intermediate coffee makers, this is the device that gets the most praise. Need a gift for someone who likes coffee but isn’t that knowledgeable? This might just the thing.
It’s a great introduction to making your own fantastic coffee without the arduous hassle and learning of espresso or siphon coffee… Just make sure you’re buying good beans and using a high quality grinder… 😉
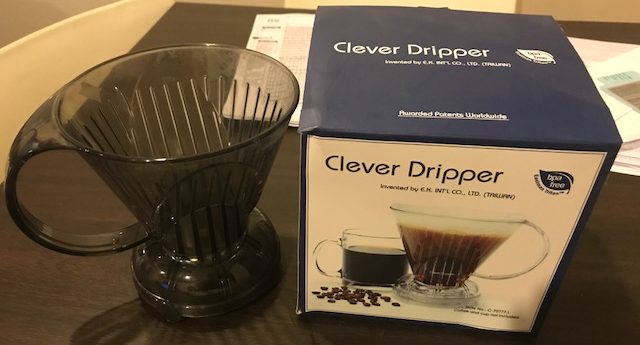
Easy to learn and makes great coffee? Why not?
Should I Get One?
The Clever Coffee Dripper has a huge amount of benefits, particularly to those who…
… want a convenient way to make coffee.
… don’t like clean up.
… don’t have much experience making their own (nice) coffee.
… don’t want to spend much.
… want a big cup of coffee in the morning (get the 16oz large size!)
It’s a great method and probably an underrated method as well. Due to its simplicity, it can be seen as a beginner method but that’s not really fair to the quality of coffee it is capable of producing.
That said, I would say that the following people may want to check out another way…
… who are looking for a craft to master (espresso)
… who really like the full-bodied taste of certain coffee (french press)
… who really want the acidic/fruity notes of their coffee to shine (pour over)

1 Comment
Thank you. I enjoy finding new ways and equipment to make my beautiful lovely coffee.